Saturday, July 30, 2011

Makeup Revisited: Zombie Skull Face Paint

So I thought it might be fun to feature a few looks from my portfolio every now and then, talking about how I achieved the look, what I was happy with and what I may do differently if I were doing it now! Hopefully this will be interesting for you guys, and beneficial for me!

(with flash - click photo to enlarge)

The first look I've decided to feature is my Zombie Skull Face Paint from a few years ago. My sister is so good and patient to let me do looks like these on her! This face paint is done strictly using three grease paint colours (beige, medium brown, and dark brown) and has no prosthetic appliances! It's amazing the level of depth you can achieve with just makeup!

To start this look I used a white eyeliner pencil to lightly map out my design. Then, using a medium brown paint I filled in the areas I had just mapped out and that I wanted to appear to recede. Using the dark brown paint I added depth by placing it around some of the edges. I then applied the light beige paint to the remaining high points of the face to further sculpt the features and bring those areas forward. If you're ever doing a look like this remember to bring your design onto the ears, down the neck and chest, the hands and any other areas of the body that are showing.

This was the very first face paint that I ever did like this and overall I'm very proud of how it turned out! I hadn't had much experience with painting teeth and would definitely alter the design to be more detailed and realistic. I think I would probably bring the teeth out further onto the cheeks as well (that is one thing that bothers me every time I see these photo's!). I would also love to have added makeup to her actual teeth to make them look dirty and decayed; and to have added a dirty, more dusty look to the hair to make a more completed looking character overall.
I've also always thought it would be cool to do a similar face paint to this, but to have sections of the skin look as though they have come off and reveal robot or machine type of material underneath! Someday!

(without flash - click photo to enlarge)

I hope you guys found this post entertaining at the least! Would you be interested in seeing more posts like this in the future?

xo candice
www.candicegroen.com
Click here to 'Like' my Facebook Page!

Tuesday, July 26, 2011

Get Glowing Summer Skin!

Summer is always our favourite time to show some skin and let our natural beauty shine through. So here's a fun tutorial on how to still have fun with a natural makeup look, and really play up a glowing tan!


1 Apply a lightweight foundation all over and concealer in areas of concern (under the eyes, on any blemishes). You'll find in the summer you not only don't like the feel of a fuller coverage foundation, but you wont need it, and light coverage foundations or tinted moisturizers are perfect for this time of year. Lightly dust a setting powder through the centre of the face.
2 Buffing a warm bronzer on the high points of the face will create a natural looking tan. Apply your bronzer across the top of the cheeks, cheekbones and nose; the temples, forehead and hairline; the jawline, chin and brow bone.
3 Apply a luminizer (highlighter) on the top of the cheekbones, down the centre of the nose, and bring it all over the lid from lash line to brow bone. This will give the skin that really gorgeous glow you always see on celebrities.
4 Use an angled brush to apply a dark brown shadow against the upper and lower lashes on the outer corners of the eyes. This is a great way to softly line your eyes and it makes your lashes appear thicker!
5 Line your waterline with an off white pencil for a wide eyed look. Avoid using a straight white pencil if you want a more natural look. 
Apply one coat of mascara to the upper lashes.
7 Softly define the natural shape of your brows. You want them to look natural, but remember that your brows frame your face and really play an important role in how polished you look.
8 Apply a light, natural beige/pink coloured gloss to the lips to finish. 


(click photos to enlarge)


And remember, one of the best ways to get glowing skin all over is to exfoliate! Exfoliating not only sloughs off dead skin which will better absorb moisture and colour, but also stimulates and brings blood to the surface of the skin to reveal a youthful and natural glow!

Hope you guys are staying radiant this summer!


Products Used:
Chanel Vitalumier Foundation
Laura Mercier Secret Camouflage Concealer
Laura Mercier Translucent Powder
Stila Stay All Day Waterproof Brow Colour 'Medium' (love!)
Guerlain Terracotta Bronzing Powder '01'
MAC Mineralize Skin Finish 'Semi Precious Crystal Pink' (limited edition)
Two Faced Eyeshadow 'Like A Virgin'
Benefit High Brow Pencil (for the waterline)
Hourglass Film Noir Mascara
Guerlain Kiss Kiss Gloss '865'


xo candice
www.candicegroen.com
Click here to 'Like' my Facebook Page!

Thursday, July 21, 2011

How Cute Is That?

Thought I'd share with you guys what nail polish I'm sporting right now!
Sephora by O.P.I Nail Colour in 'How Cute Is That?'.


Such a pretty colour and great for summer! It's a light melon pink with golden pink shimmer and looks great on everyone! (Even my mom decided she was going to steal it from me!). It reminds me of a brighter, pinker Nars 'Orgasm' Nail Polish!

What are some of your favourite nail polish colours for summer?

xo candice
www.candicegroen.com
Click here to 'Like' my Facebook Page!

Tuesday, July 19, 2011

What's In My Makeup Bag? Camping Edition

So I just got back from a weekend camping trip with some friends and thought I'd share with you guys what beauty products I brought with me in a quick 'What's In My Makeup Bag' blog post! It may be more than what you would bring but hey, the beauty addict inside me can't help herself!


I really tried to keep things as simple and minimal as possible so for my skincare products I brought a B. Kamins Day Cream SPF 15 (sample size), Philosophy's Hope Springs Eternal Hydrating Mist (sample size) which was great for cooling down in the hot weather, and a pack of Ole Henriksen Truth To Go Cleansing Wipes (available in travel size) for an easy way to clean off makeup, dirt and oil at the end of the day!

As far as cosmetics go I made sure to bring my Laura Mercier Secret Camouflage Concealer for an under eye boost in the mornings and my Benefit Hoolah Matte Bronzer to even out the skin and give me a bit of colour. I also grabbed my Stila Waterproof Brow Tint and Makeup Forever Waterproof Smokey Lash Mascara (sample size) because not only am I a girl obsessed with her brows, but because everyone knows how far a little mascara can go! I also brought a B. Kamins Lip Balm SPF 20 (sample size) that was great for sun protection and hydration!

Those little sample sized products you get at cosmetics stores and counters are great for when you're travelling or staying somewhere over night because they're prepackaged and don't take up much space in your bags. All of the products I brought fit comfortably in a small makeup bag and took under two minutes to apply in the mornings.

* Don't forget other beauty essentials like unscented body lotion and sunscreen (keep your lotions and potions as unscented as possible so that you don't attract those unwanted bug bites)! And if you're staying for any period of time remember your dry shampoo! Dry shampoo is a lifesaver for limp greasy roots when you can't wash your hair. I highly recommend Rene Furterer Naturia Dry Shampoo to everyone because it is amazing!! It works on all hair colours (yes brunettes, even on us!) and all hair types and textures! It doesn't leave any grit or texture in the hair, just a freshly cleansed look as easy as 1, 2, 3!

* If you're looking for some great waterproof products this summer be sure to check out Makeup Forever for products like cream blushes, shadows, lip colours, concealers, foundations and more. Another great waterproof savvy brand to check out is Tarte for products like mascaras, eyeliners, concealers, and bronzers! Stila and Benefit also make some great waterproof products (brows, cheek/lip stains, and liners) that are perfect for summer!

What are some of your favourite waterproof products and what's in your makeup bag?

xo candice
www.candicegroen.com
Click here to like my Facebook Page!

Sunday, July 10, 2011

Review: The Beautyblender Sponge

So I'm sure that if you've heard of the Beautyblender you're probably asking yourself 'Why is the Beautyblender so amazing and what makes it different from any other makeup sponge?'.


Well, here are some points of difference...
1 The Beautyblender was made without edges (unlike your typical square or flat round sponge) so that as your blending, you will never be able to see where the foundation begins and ends. This is a huge advantage because you will never have streaky foundation!
The Beautyblender is meant to be used damp and when you add water to it it expands to nearly double it's size! Sponges absorb liquid, but if your Beautyblender is already wet, it wont absorb any of your foundation! The slightly damp sponge also leaves a cool and refreshing feeling on your face as you apply your foundation.
Beautyblender is very lightweight and much less dense than other egg shaped sponges which means it has more bounce and is comfortable on the skin. I also find that this feature gives you more control of how much product you are depositing.
4 You can also use your Beautyblender with concealers, loose mineral powders, cream blushes and bronzers, and even self tanners!

To use your Beautyblender...
Submerge your Beautyblender in water and squeeze out the excess with your hands or in a towel.
Dot your foundation all over the face and then bounce and stipple the Beatuyblender all over to evenly distribute the foundation with ease.
If you want more coverage, simply repeat the process by adding more foundation.
4 Use the tapered end for tough to reach areas like around the eyes and nose. Or you can use it for concealer or blush work!
I like to use my Beautyblender to soften the edges of my blushes and bronzers that I have applied with brushes. I can take my Beautyblender with whatever foundation remains on the sponge and bounce it around the edges of my blush and bronzer to give them perfectly airbrushed edges!

To take care of your Beautyblender...
1 You should ideally wash your sponge after each use.
2 Beautyblender has a Blendercleanser but I just use a gentle baby shampoo that I work into the sponge by rubbing it gently with my thumb and forefinger. Work the shampoo into the sponge and rinse under water... repeat until clean.
3 I store my Beautyblender in a glass jar on my desk while it shrinks and dries.
4 If properly taken care of, a Beautyblender sponge should last approximately 3 months. You'll know it's time to change your sponge when the pink colour fades, and it just wont shrink back to it's original size and shape.

The effect I find I get from my Beautyblender reminds me of an airbrushed look. I find the foundation sits on the skin a lot nicer and is a lot less likely to catch on dry skin or blemishes. The coverage it gives really depends on the foundation you are using, so first determine the amount of coverage your foundation gives. That being said, the Beautyblender makes layering products a breeze. You can layer whatever product you want with the sponge to achieve more coverage yet maintain a fairly natural look! I also love how quick and effortless it is and how if I'm giving myself a bit of a tan, it's easy to get the neck and ears! I love my Beautyblender and will definitely be a dedicated client for a long time!

I picked up my Beautyblender at IMATS but if you go to the BeautyBlender website you can find a list of retailers in your area.

I hope this was helpful! (PS I only said Beautyblender 23 times in this post... well I guess now it's 24!)

xo candice
www.candicegroen.com
Click here to 'Like' my Facebook Page!

Wednesday, July 6, 2011

Review: DuWop Revolotion Body Bronzer

Where do I even start? I can't explain to you guys how much I love this product!
I'm a fairly light girl... and it takes a good amount of sun to get some colour on me (especially my legs) but I love to sport shorts and dresses in the warm weather!
The DuWop Revolotion Body Bronzer makes that summer skin we love look even better!

Here's a shot of my left leg with Revolotion on and my right leg without it.
See the difference?

Here's why I love it:
It gives the skin a bit of bronze colour (like a self tanner would) but smooths on easily and non streaky and washes right off (which means no orange hands and no semi-permanent orange patches)!
It evens out the skin tone like a light foundation for the body (so it's great for girls concious about veins, redness, dark spots or KP).
Your skin genuinely looks healthier, more hydrated and glowing and is protected by SPF 15.
It has no shimmer so it looks naturally beautiful! You don't have to worry about going outside and sparkling like a disco ball.
The colour is a true brown that never looks orange so you'll aways look naturally sun kissed!
A little bit goes a long way and it's layerable to get darker colour or more coverage depending on the look you want.
It comes in two shades (original and deep) so it works great for all skin tones!
Duwop's website even recommends using it to naturally contour the face for more defined features!

Here's how I use it:
I recommend waiting about 5 minutes before getting dressed to avoid transfer of the product onto your cloths. Personally, I've never had an issue with this rubbing off on anything!
I always put on a body butter first and then apply this... it's an extra step but it makes a big difference. I get the hydration I need for my dry skin from the body butter and then find that the body bronzer glides on much more smoothly and I end up using less of it!
Wash your hands! The product wont stain... but brown palms aren't exactly attractive.


So what do you guys think? Is this a product you can jump onboard with? Cause' it's always going to be a staple in my beauty routine!

xo candice

Monday, July 4, 2011

Loud and Proud!

Here's a fun rainbow eyeshadow look inspired by Toronto's Pride Week! I was going to have all six colours on each lid but decided to shake it up and do something I haven't done before and I think it makes the look a lot more interesting!


1 Apply foundation all over and concealer in areas of concern, leaving concealer under the eyes for later. Leaving the under eye concealer until the eyeshadow is done guarantees a bright and clean under eye area which really makes or breaks how polished your makeup looks.
2 Contour in the hollows of the cheeks, in the temples, and around the hairline with a matte bronzer. Apply a peachy gold blush to the apples of the cheeks.
3 Apply a creamy white eye product (like NYX Jumbo Pencils and cream shadows like Makeup Forever's Flash Colour) all over the lid from lash line to just above the crease and onto the inner corner of the eye. Blend the edges with your finger.
4 With a small eyeshadow brush press a vibrant green eyeshadow onto the inner corner of the eye and onto the first third of the lid. It is important to press on the shadow. It means less fallout and stronger pigment.
5 Press a bright blue eyeshadow onto the centre of the lid and blend the edge into the green shadow.
6 Pack a vibrant purple shadow onto the outer third of the lid and blend the edge into the blue shadow. The best way to blend two colours like this together is to drag the blue into the purple, then pick up purple shadow and blend it into the blue, and continue to go back and forth picking up the opposite colour and lightly dragging their edges into one another until you have a nice gradient.
7 Repeat steps 4 through 6 on the opposite eye replacing the green with yellow, the blue with orange, and the purple with pink.
8 Line the upper and lower water line with a black eyeliner pencil and make sure to wrap the liner in and around the inner corner of the eye.
9 Mirror the colours on the top of the lid tightly against the lower lashes. Green on the first lower third of the lash line, blue in the centre, and purple along the outer third of the lower lash line. Follow with yellow, orange, and pink on the opposite eye.
10 Apply mascara to the upper lashes and very lightly to the lower lashes.
11 Lightly buff on concealer under the eyes to brighten the area and clean up any fallen shadow. Powder under the eyes and through the centre of the face to set the makeup and reduce shine.
12 Apply a bubble gum pink lip gloss to the lips! I mixed two gloss colours together to get the colour I wanted. You want the pink to show but you want it to be sheer so that it doesn't contrast too much with eye shadow.


(click photo's to enlarge)

I love doing these brightly coloured looks because it's so much fun and great practice for blending! Summer has me excited to use colour so expect to see more bright and colourful looks in the upcoming months! (I assure you the deep blue is actual purple in real life!)

Products Used:
Lancome Tient Idole Ultra Foundation 'Buff 06'
Two Faced Absolutely Flawless Concealer
Anastasia Brow Powder 'Ash Blonde'
Laura Mercier Translucent Powder
Benefit Bronzer 'Hoola'
Nars Blush 'Luster'
Urban Decay Eyeshadow Primer
NXY Jumbo Pencil 'Milk'
Anma Rucci Eyeshadow Palette (similar to BH Cosmetics 120 Palette)
Urban Decay 24/7 Glide On Pencil 'Zero'
Tarte Lights, Camera, Lashes mascara
Nars Lipgloss 'Angelika'
Nars Lipgloss 'Easy Lover'


xo candice
www.candicegroen.com
Click here to 'Like' my Facebook Page!
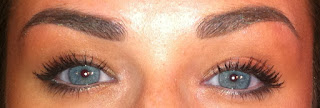
Sunday, July 3, 2011

June Favourites!

Let's waist no time getting into these great products to kick start summer!

My number one favourite product that I've absolutely loved this month is the Hourglass Film Noir mascara!  I love everything from the shape of the brush, ease of application, and rich formula. I'm definitely not a girl with whimpy lashes (when I'm using the right mascara) but I still love a dramatic mascara thats going to give me lots of volume and lots of length. I also really like a product that gives me a nice feathery look and I get all of that and more with this amazing mascara! It's pricey, but it's amazing.

I've also been all about my Beauty Blender Sponge this month. It works fast, delivers flawless non streaky coverage, and feels fresh on the face! I aslo love to use the beauty blender after I've applied blush and bronzer to create a perfectly blended edge for complexion products! To use it, wet the sponge and squeeze out the excess water. Dot your foundation all over the face and then stipple and press the sponge around the face to evenly blend out the foundation. The tapered end is great for getting tricky areas like around the nose and eyes!

This next product is one that I've loved for years but get the most use of during the summer months. June has had me busting out my DuWop Revolotion Body Bronzer almost every day! This bronzing body lotion gives a healthy glow, evens skin tone, hydrates, has sun protection, and is amazing! So amazing, in fact, I'm going to do a separate post dedicated strictly to this product ASAP!

I've also been wearing my Nars Blush in Luster all month and it's been my go to summer blush colour for a couple of years now. This warm peach blush has a subtle amount of shimmer that gives the cheeks a beautiful dewy glow. This blush plays perfectly with a tan and I highly recommend it to light/medium to medium/deep skin tones.

What products did you love this month? What are your favourite products to play up your sexy summer skin?

xo candice
www.candicegroen.com
Click here to like my Facebook Page!